Adding your tour to Google Things to Do

What is Google Things to Do? #

Google Things to Do links your tour’s Major Landmarks directly to locations on Google Search and Google Maps. This link significantly increases discoverability across two of the most popular products used by travellers.

Things to Do on Google Maps #

The Google Maps result for “Tuileries Garden” with a list of connected experiences, including a VoiceMap tour at the top.

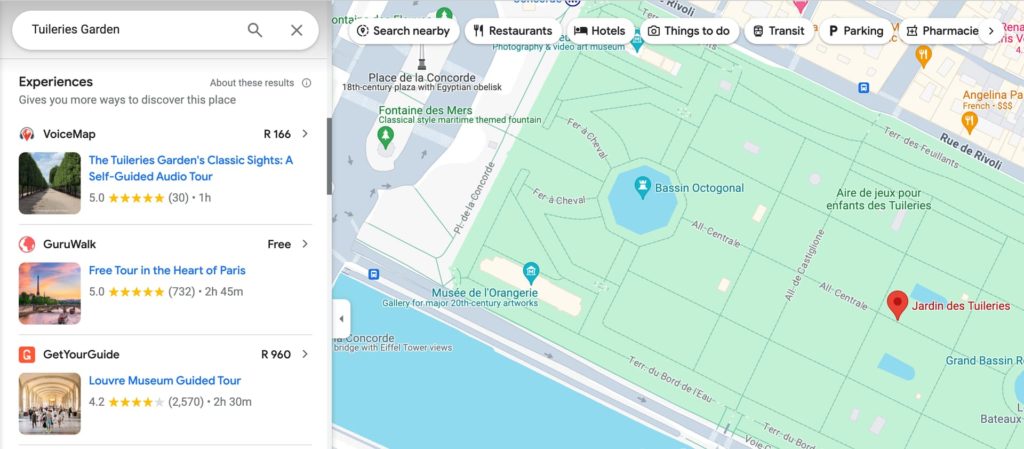
Google Maps is a perfect fit for VoiceMap tours because it’s used for on-the-go queries by people who are comfortable navigating independently. When you’re already in a destination, ready to go, scheduled tours that need to be booked in advance don’t make nearly as much sense as on-demand, self-guided tours.

If your tour is correctly linked to the locations it passes by and describes, it’ll display under Experiences for some but not all location types. 

Things to Do on Google Search #
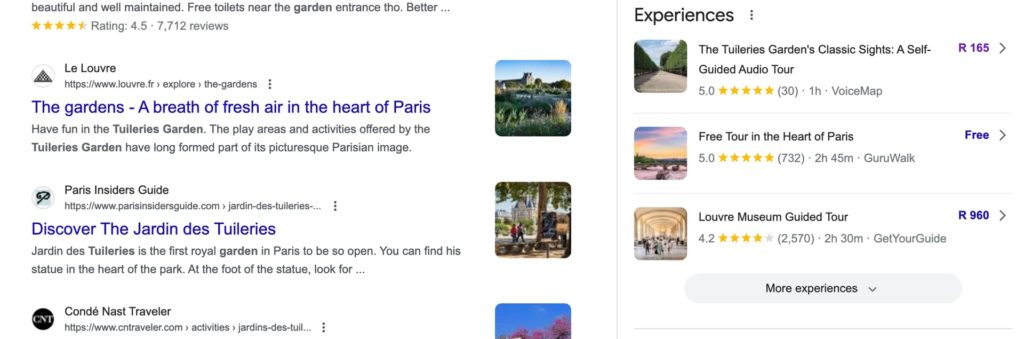
A Google Search result for “Tuileries Garden” with related experiences in the knowledge panel that displays to the right of listed results.

When somebody searches for a well known landmark, Google displays a knowledge panel to the right of the search results with an overview that includes related experiences. These landmarks typically have much more search activity than your tour will get on its own. It helps if your tours rank highly enough to appear as one of the top three linked experiences in the knowledge panel. This is likely to come down to whether it has positive reviews, a strong photo, a low bounce rate when users click through to it and other quality indicators.

Step-by-step guide to editing your Major Landmarks #

Video Guide #

Watch the short demo video below to see how to convert the Major Landmarks of a VoiceMap tour to the corresponding Google Maps locations.

Step-by-step Instructions #

Access your publisher dashboard #

  1. Navigate to your Publisher Dashboard: Log in to your publisher account, go to your Publisher Dashboard and scroll down to your list of tours.

Go to your tour’s Distribution Tab #

  1. Select the Manage Distribution Icon: In the Manage column, click the Manage Distribution icon for the tour you want to edit. The Distribution tab will automatically open.
  2. Scroll to the Google Things to Do section: At the bottom of the Distribution tab, you will see the Google Things to Do section, which includes all the major landmarks you added to your tour.

Editing and Linking Locations #

  1. Select the Edit Button: Access the Google Things to Do section and click the Edit button.
  2. Search for Major Attractions: Use the search bar to locate the major attractions you wish to link. Google makes this easy to do by automatically pulling suggestions from their global database of locations.
  3. Add Linked Location: After selecting the correct attraction, click Add to include the linked location at the bottom of the attractions list.
  4. Remove Duplicate Landmarks: To prevent duplicates on the tour page, delete any previously included attractions added as text. If an attraction isn’t found on Google but you still want to list it, leave it as text.
  5. Check for Missing Landmarks: Ensure all key attractions are included. If any are missing, add them, ensuring they’re attractions users will encounter on the tour.
  6. Ensure Accuracy: Verify all linked locations are accurate and relevant to the tour to avoid misleading users. Google suggests locations from a global database of millions of locations, so it’s possible that multiple similarly named but different locations will be suggested. If, for example, you search for St Mary’s Church, you will have to narrow this search down. Try adding the street name followed by the destination name to make sure you select the correct St Mary’s Church. The more specific you are when you type in the attraction name, the better.
  7. Reorder Locations: Use the ‘drag and drop’ button on the left of each location to reorder the locations. The locations should be listed in the order that travellers pass them on the route. Click on the icon with the eight dots and drag the location up or down to it’s correct position on the route. This helps users to better understand the route they’ll be following if they buy the tour, rather than just knowing what attractions they’ll be passing.

Saving Changes #

  • To save your changes, click Save. This will save your updates and allow you to come back to make more changes. This will not submit your changes to us, and your tour will not be added to Google Things to Do, but is useful if you want to come back to finish updates at a later time.

Submitting Changes #

  • When you have updated all the Major Landmarks and you are ready to Submit these changes to us, select Submit. You can go back and make changes once you have clicked Submit, but it’s best to submit once you’ve finished adding your locations and putting them in the correct order.

Repeat For Each Tour #

  • Each tour needs to be added to Things to Do individually, so you’ll need to repeat the above steps for each tour.

What next? #

Once you have submitted your updated locations, your tour will automatically be submitted to Things To Do. Submitting the products involves manual review processes, so it may take a few weeks to a month for your tour to start appearing on Google.

How useful was this?

Click on a star to rate it

Average rating 5 / 5. Rating count: 21

No ratings so far. Be the first to leave a rating.

How can we make this more useful?

Was this part of the tutorial not detailed or clear enough? What questions do you still have that could have been answered here?