Using voucher codes
7 min readVoucher codes are 8-character alphanumeric codes, like 1SAMPLE2, that give listeners access to your tour without paying for it through VoiceMap. When someone enters a voucher code in the VoiceMap app or follows a redemption link on the web, one download credit is deducted from your balance.
You can distribute voucher codes however you like: give them away for free, sell them directly through your own website, or supply them to resellers and other distributors in bulk. VoiceMap only charges you for the credit. After that, you keep all the revenue.
In order to create vouchers, you need download credits. Each credit is valid for a single download of your tour. Credits are deducted from your balance when someone downloads a free tour or redeems a voucher code. No credits are used when a listener pays for a download through the VoiceMap apps, the website, or our resellers.
For more on how credits work, including how to purchase them and what they cost, see Using download credits for free tours and voucher codes.
Managing vouchers using the publisher dashboard
The Manage Vouchers tab of the publisher dashboard has three sections: A Summary (of the vouchers you've issued and the amount of credits you have left), Issue Vouchers and Your Vouchers. You can access this tab from the My Account menu or from the first tab of the dashboard.
Summary
In the summary, you'll see the number of vouchers you've allocated to specific tours, the number of those that have been redeemed (so how many listeners have downloaded tours using those vouchers), and the number of credits you have left for voucher redemptions. Listeners can only use your voucher codes when you have enough credits left, so if you're running low, you can purchase some more on the Credit Balance tab.
Issue Vouchers
To issue a new voucher, scroll down to the section called Issue Vouchers and select:
- The name of the tour your new voucher can be used to redeem
- How many unique codes you'd like to create
- How many downloads you'd like each voucher to be valid for
You can edit your codes later, under Your Vouchers, and you can also adjust how many downloads you've allocated to each code – or delete unused voucher codes completely.
Let's say you want to create 150 voucher codes, you could opt for 150 codes with 1 download each, 1 code with 150 downloads, 15 codes with 10 downloads, or any other combination. You can also choose to have "No download limit". The best choice comes down to how you intend to distribute your tour.
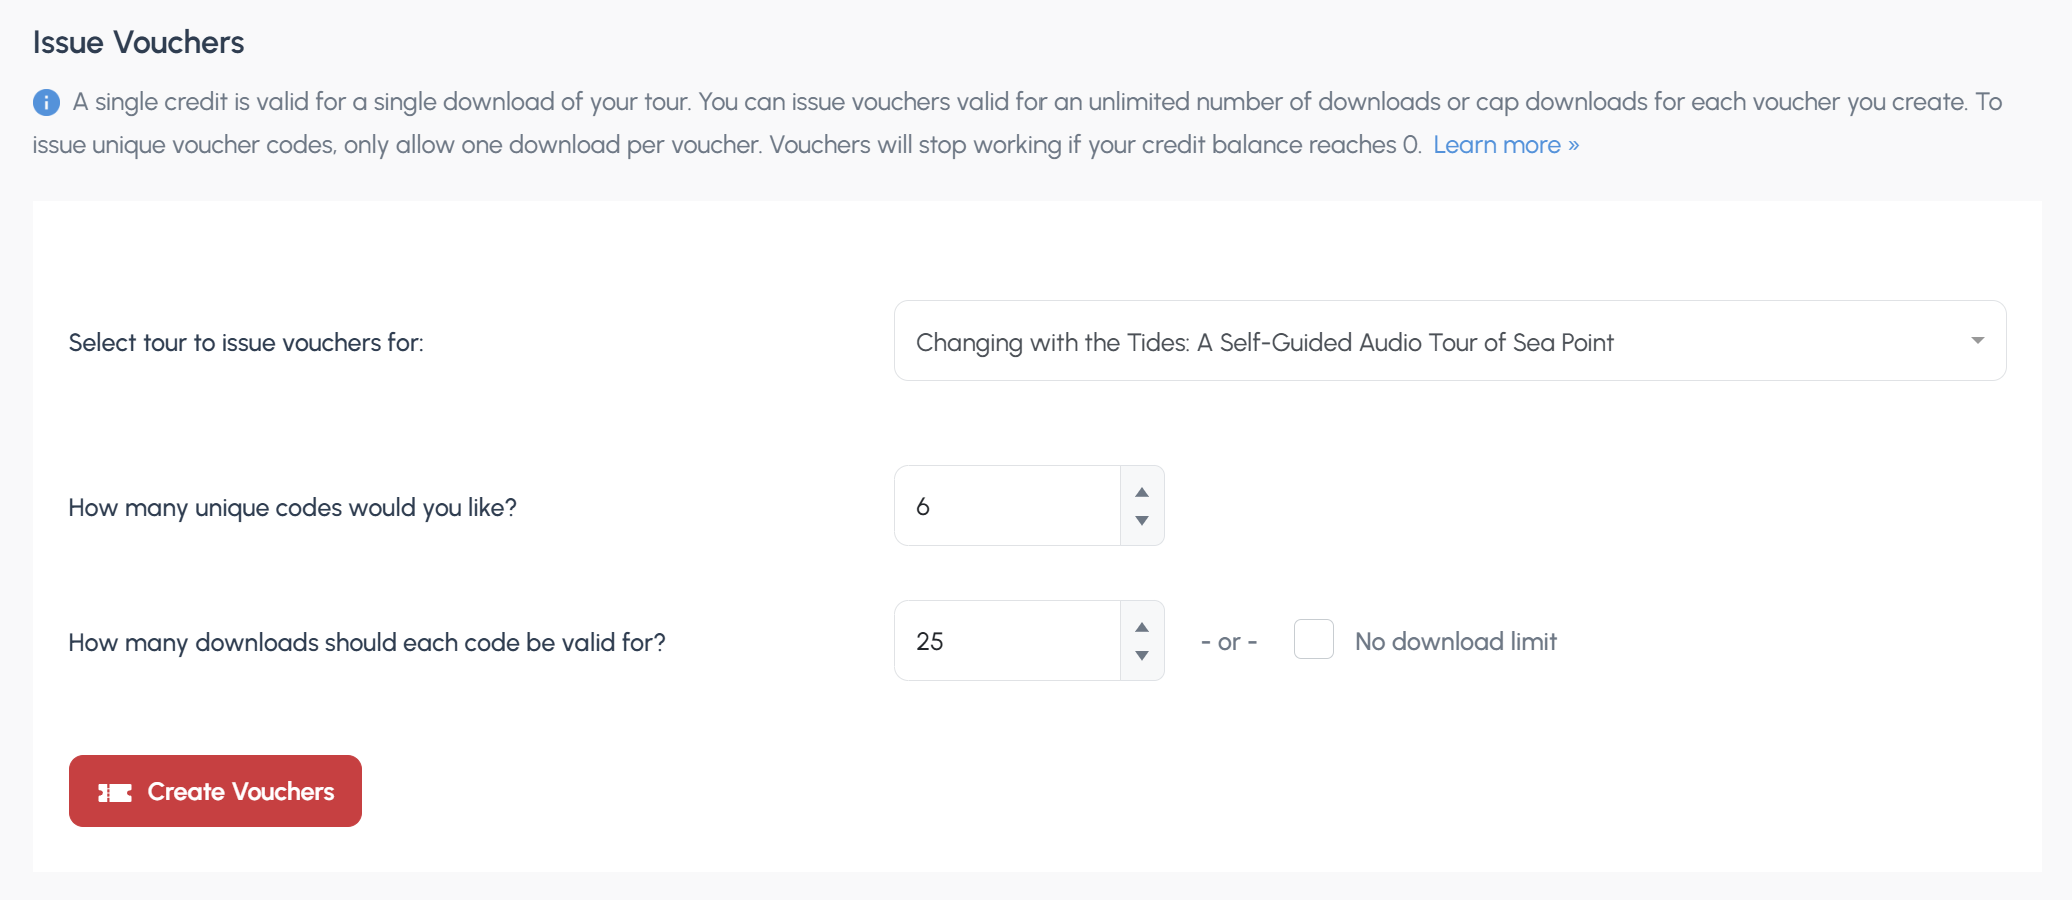 Issuing 6 unique voucher codes with 25 downloads each for the tour Changing with the Tides.
Your Vouchers
When you click on the Create Vouchers button the vouchers should appear in the list below, in the section called Your Vouchers. The table lists all the vouchers you’ve created, and has six columns:
- Voucher Code, which can be sorted alphabetically
- Tour Name, which can be sorted alphabetically and also filtered, allowing you to only show vouchers linked to the tours you select
- Limit, displaying how many downloads the voucher code is valid for
- Used, displaying how many times this code has already been used to access your tour
- Created At, which can be sorted to show the oldest or newest codes first
- Redemption Link, displaying the url that can be used to redeem your tour at voicemap.me
To change the text of a voucher code, click on Edit, enter the new code, then click on Save. All voucher codes must be eight characters long. They must also be unique.
You can change how many times a voucher code can be downloaded by clicking on Edit. If you increase or decrease the number, the change will reflect in the number of issued vouchers, which is displayed under your Summary. If you have a credit balance of 100, for example, and you decrease the number of credits added to a particular voucher from 100 to 50, your credit balance will be 150 after you click on Save. Vouchers will stop working if your credit balance reaches 0.
To delete a code, select it using the checkbox to the left of the table, then click on the Apply button at the top of the table, next to the Bulk Actions dropdown. You can only delete vouchers that have no redemptions. All the credits linked to deleted vouchers are returned to your credit balance.
You can export the entire list as a CSV by clicking on the button at the top of the table labelled – you guessed it – "Export table to CSV".
How listeners redeem voucher codes
Listeners can redeem a voucher code directly in the VoiceMap app by selecting Tour Codes from the menu, then Enter Codes. You will find the instructions for this below.
We recommend giving instructions for redemption in the VoiceMap mobile apps – unless you specifically intend for the tours to be played using the interface at voicemap.me, that is, in which case you can use the urls at the far right of the voucher code list.
You can embed a code in your tour's URL by adding ?voucher=YOURCODE to the end of the web address — anyone who clicks the link will see a Redeem button instead of the tour's price. If your code was 1SAMPLE2, the link would look like this:
voicemap.me/tour/london/theatreland-tour-with-ian-mckellen?voucher=1SAMPLE2
This makes redemption a single click for the listener and works well for email campaigns, social media posts, or anywhere you want to reduce friction. When sharing a code directly, include the instructions below.
Instructions for redeeming tours with voucher codes
When you provide a listener with a tour code, you also need to provide them with instructions to redeem that code.
The basic instructions for redemption through the VoiceMap mobile apps normally look something like this:
🎫
YOUR VOUCHER CODE: 1SAMPLE2
🚶🏽♀️
TO USE IT:
1. Install VoiceMap from the Apple App Store or Google Play
2. Create an account
3. Select Tour Codes from the menu, then select Enter Codes
4. Enter the code 1SAMPLE2 then select Download Now
This is often enough, but over time – and tens of thousands of redemptions – we've expanded these instructions to include more detail, and we now recommend something like the following:
To use your tour, please read the important instructions below and disregard all other codes except for this one: 1SAMPLE2
⤓
DOWNLOAD INSTRUCTIONS:

1. Install the VoiceMap mobile app. (Just search the Apple App Store or Google Play for VoiceMap Audio Tours.)
2. Create an account
3. Select Tour Codes from the menu, then select Enter Codes
4. Enter the code below then select Download Now
#
YOUR CODE:
1SAMPLE2
[FOR UNIQUE CODES, VALID FOR 1 COPY PER CODE] This code can be used to redeem one copy of the tour. Codes are not case sensitive.
[FOR CODES VALID FOR MULTIPLE COPIES] This code can be used by every member of your party. If you have booked for three people, for example, three people can download this tour using the same code. Codes are not case sensitive.
⌁
PLEASE ALSO NOTE:

* You can download the tour at any time, before or after your booking date. It's best to download the tour before you set off for the starting point.
* When the download completes, you'll see a screen with a photo of the starting point and directions to it. The red start button will become active when you are at the starting point.
* This tour follows a set route and includes turn-by-turn directions. It works best if you start it in the right place and follow the directions from one location to the next.
* The download should only take a few minutes to complete. If it takes longer, please cancel the download, go to Account, select Purchased and download the tour from there.
* Remember to bring your own headphones, unless you have booked a driving tour.
✉
SUPPORT:
For technical support and other queries, please email [email protected]