Mapping indoor tours
9 min readIndoor tours have a dedicated player in the VoiceMap apps, with their own interface specifically designed for places where GPS playback isn’t possible like museums, galleries and even wine cellars, shopping malls, or outdoor sculpture gardens.
The indoor tour player’s user interface
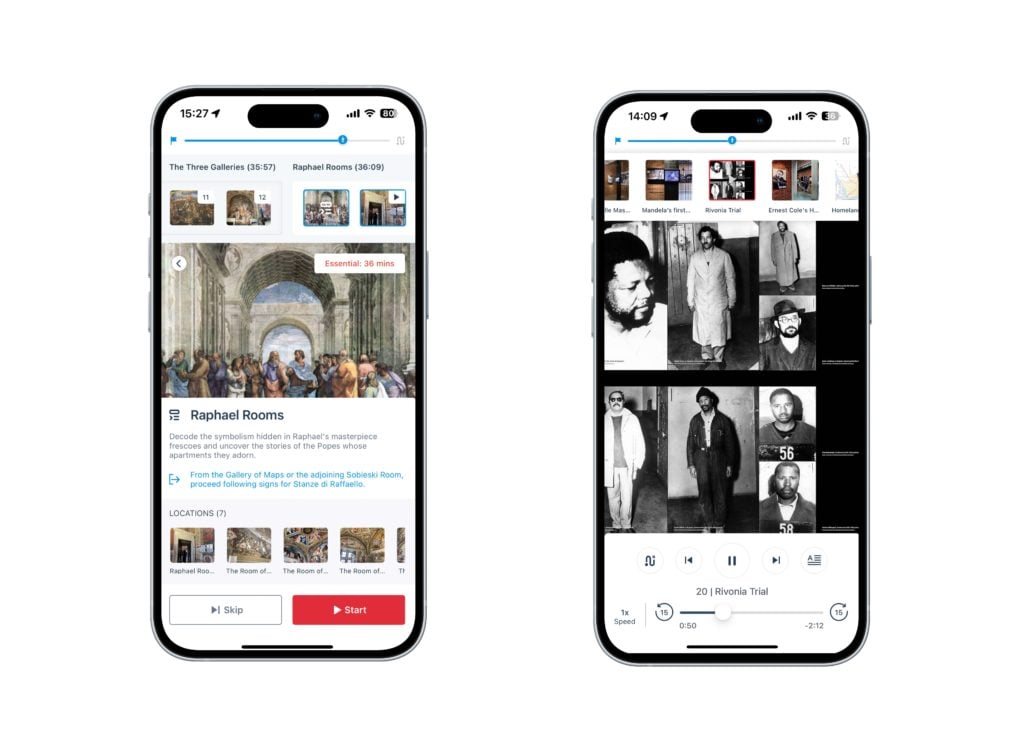
The indoor tour player:
- Includes images with every single location
- Has on-screen directions to help listeners find their way from one point to the next if they move through the tour along a particular route, in a specific order
- Displays a carousel with the name and thumbnail of every location at the top of the screen, allowing users to navigate without following a route, if they prefer
- A progression bar
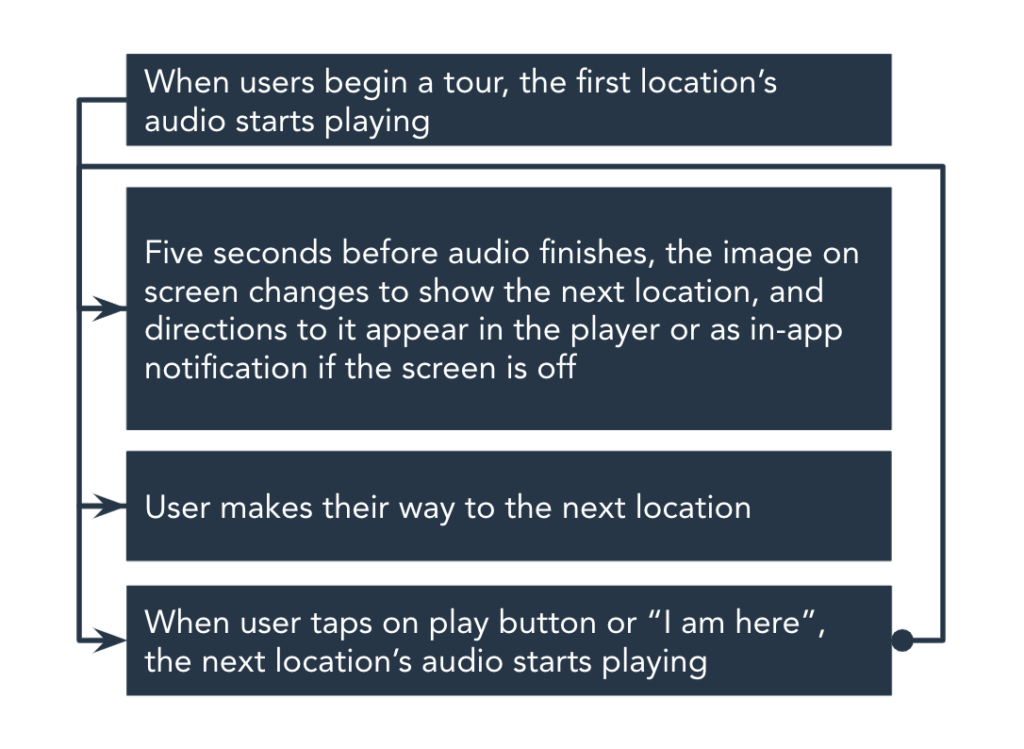
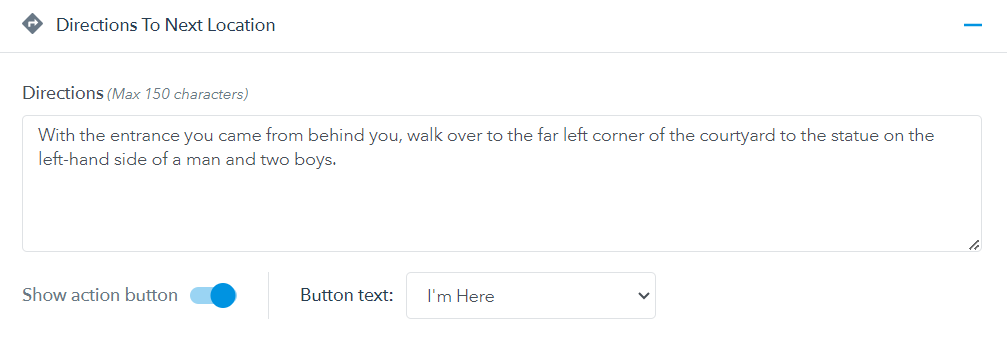
When the listener starts an indoor tour, a photo of what they should see when they’re at the tour’s first location is displayed on their screen. Five seconds before the first location’s audio ends, directions to the next location pop up on the screen, along with a photo of the next location and a button labelled “I am here”, which you can see in the example above. When they reach that next location – and they’re standing in front of the image displayed on their screen – they can hit either “I am here” or the play button to start playback. Then, five seconds before this audio ends, the photo changes again, and directions to the third location appear on the screen, at the same time as the “I am here” button. This sequence will continue until they have listened to all the locations on the tour.
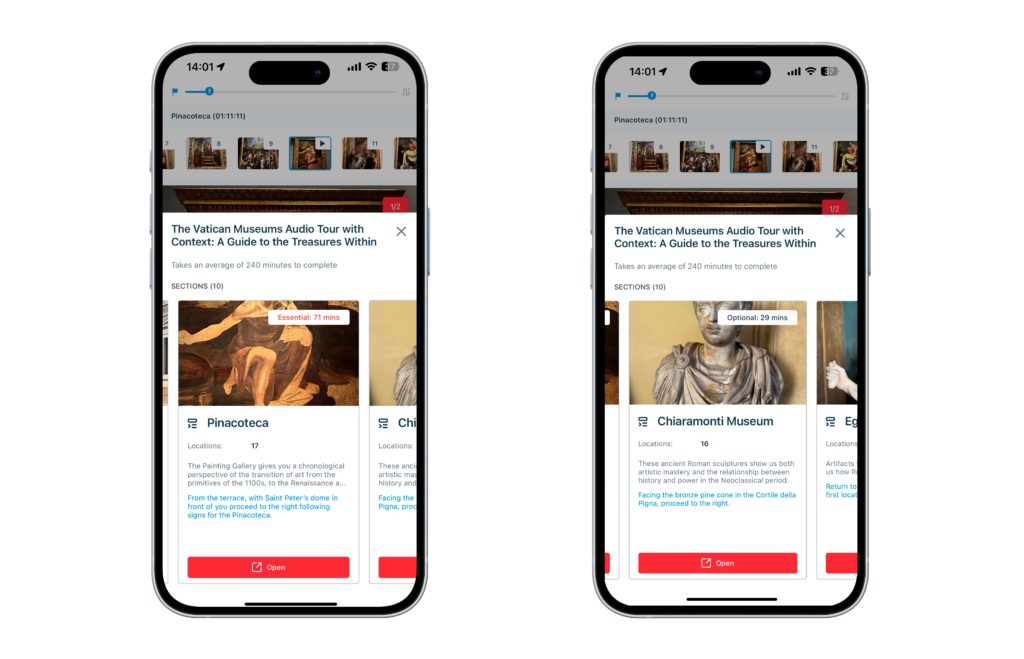
Indoor tours can also be divided up into sections. This works best for large museums and galleries where each wing or floor might contain a different theme. Some of the wings, rooms or floors can be optional, giving users the option to skip entire sections.
Each section has a title, a short description of what’s covered in the section and directions on where to start the section. They also have a label letting users know if the section is optional or essential and how long the entire section lasts. When they reach the starting point of a new section, they can choose to “skip” or “play”. And a carousel at the top of their screen lets them see how many locations are in each section.
Creating an indoor tour in Mapmaker
Setting up an indoor tour is simpler than an outdoor tour because you don’t have a route line with automatic GPS playback. Instead, they have a starting point, a list of locations and, if needed, sections.
How do I add locations to an indoor tour?
Indoor tours might not use GPS playback, but locations are at the core of Mapmaker and for each point on your tour that will eventually have its own image and audio file, you need to add a new location.
The first location, at the start of the tour, is the only location that needs to be put in exactly the right place. The app still uses GPS for this, both on the starting point screen – to help listeners find their way to the correct location – and when sorting tours by proximity to the listener.
Once the first location is placed, you won’t see the map anymore. You’ll see the script tab in Mapmaker where you can add locations one at a time, or in batches. It’s also important to keep the locations in sequence. This is because the on-screen directions follow the sequence and explain how to get from one location to the next.
How do I create sections for an indoor tour?
Next to the script tab in Mapmaker, there’s an Organise locations tab.
First, add in as many sections as you need. How many sections you have, depends on how you want to organise the tour. You could separate the sections based on various wings, rooms or floors in a building or based on a theme.
Each new section includes:
- A title no longer than 25 characters
- A label, for example Essential or Optional
- A colour – it’s best to stick with one colour per label
- A description of what’s covered in the section. The description can’t be more than 140 characters
- Directions on where to start the section. This can’t be more than 80 characters
- A cover image for the section – it should capture the essence of the section
Once you have your sections added, you’ll need to organise the locations. On the left-hand side, you’ll see a list of your locations. Click on Multi Select to select multiple locations at once to move to a specific section or click and drag one location at a time. You can update the locations within a section and add new locations to a specific section at any point.
The colour you assign to your section will show up in the Scripts tab so it can be useful to assign colours based on the theme or whether a section is optional or not. This will help you easily differentiate between the sections in the Scripts tab.
How do directions work on an indoor tour?
We recommend a set route for indoor tours – just like we do for outdoor tours – because you can establish context and help the listener navigate.
For indoor tours, you help listeners navigate by providing clear and straightforward text directions that appear five seconds before a location’s audio finishes, at the same time as the “I am here” button and the next location’s image.
You can add in the on-screen directions yourself. Remember, if you can’t provide the directions in 150 characters, then you probably need another location to help guide users from one point to the next. We recommend keeping these as short as possible to prevent them from taking up too much of the device’s screen.
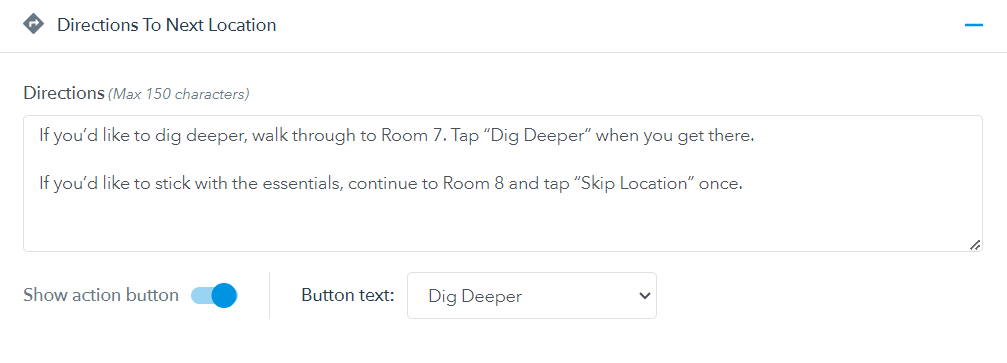
Underneath the directions field, there’s a toggle to show action buttons. This is used when a location is optional. Currently, the options are to play the location by clicking “I’m here” or having optional locations that’ll show “Dig Deeper” or “Skip Location”.
If the next location is optional, you need to provide concise instructions for if they choose to play the next location or, if they skip it, where to go to start the next location.
Remember, the directions and action buttons are for the next location. This means that on location 2, you’ll add in the directions that help listeners get from location 2 to location 3. And the action you choose will be the action button they see when they reach location 3.
What is Dig Deeper and how does it work?
Tours can now include optional locations as well as optional sections.
Optional locations are currently labeled as Dig Deeper and allow users to learn more about a particular subject. They can’t be started halfway through a location. They’re their own location that plays at the end of a location before they move on to the next location.
For example, in an art gallery, you might stop the listener in front of an artwork by a particular artist but more of their artwork appears in the same room. In this case, you can use Dig Deeper to give listeners the option of learning about some of those other pieces by that artist. They’d start the Dig Deeper after hearing about the prominent piece that forms part of the main narrative. At the end of that location, you’d say that they have two options, one to Dig Deeper and see more artwork by the same artists or to move on to the next room and the next artists. You’d then provide instructions on where to start both locations.
The Dig Deeper location might be slightly longer and more in-depth than the location preceding it. At the end of the Dig Deeper location, you’ll need to provide instructions on where to start the next location. You can also have more than one Dig Deeper in a row.
How do I add images to an indoor tour?
Indoor tours require an image for every location. But you can add up to five images per location.
The first image is a reference for the listener, to help them navigate, and they should show what the listener is actually going to see as accurately as possible.
After the first image, you can include other images. You’ll find more information about adding images to your locations here.
Examples
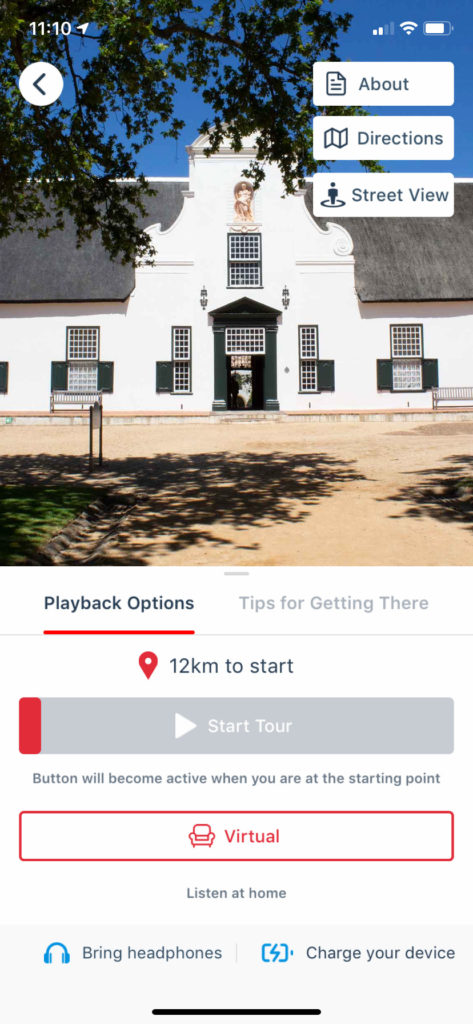
To get a clearer sense of how indoor tours work, we recommend downloading one in the app and listening to it in Virtual mode. These indoor tours are great, but there are also some free ones available:
- Apartheid Museum: A Tour of its Permanent Exhibition
- The Vatican Museums Audio Tour with Context: A Guide to the Treasures Within
- Grand Central Terminal: An Audio Tour of its Secrets and Stories with TellBetter
Please email your editor if you’d like further recommendations.